Many years ago, food and wine expert Bill St. John and I used to appear on a Denver television show called Colorado Today, a ‘lite’ morning news and lifestyle show.
Every Friday morning I shared photos and design ideas about a Colorado home, but the real draw of the show was Bill St. John’s food segment. At that time he was the food editor at the Denver Post, and one November morning he demonstrated how to massage the turkey with a butter/flour mixture before roasting it.

It was a little kinky, but it was a great tip. I’ve been cooking our turkey this way ever since.
The French call the kneaded flour and butter mixture beurre manié, and it’s simply equal parts of flour and butter.
Beurre manié is usually used to thicken sauces, but for this preparation the flour is reduced by half. After lovingly caressing the turkey and coating it with the mixture, you pop it in a hot oven and don’t peek for 30 minutes. This creates a little crust on the outside of the bird, which seals in all the juices. Then you lower the temperature for a nice roast.
Here’s the recipe.
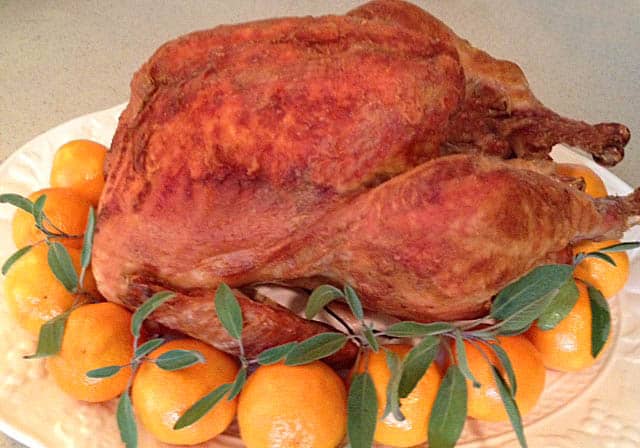
Golden, Crispy, Juicy Roast Turkey
For the brine:
- 1 untreated* turkey, size and type of your choice (completely thawed, if frozen)
- 2 cups non-iodized salt
- 2 gallons water
For the turkey coating:
- salt and freshly ground black pepper
- 1 stick (1/2 cup) salted butter, softened
- 1/4 cup all-purpose flour
Brining the Turkey
I’m a convert to the brining process, which I (and the turkey) begin the day before Thanksgiving. It’s really worth taking this extra step, because brining imparts such a noticeably improved flavor to the meat.
*You only want to brine a plain, untreated turkey. If your turkey package has the words “enhanced,” self-basting” or “kosher,” salt has already been added and brining would make the meat too salty.
You’ll need to find a container large enough to completely submerge your turkey. We have a large, lidded, food-safe bucket just for this purpose, but you can also use a large stockpot. Some people even clear out and clean one of their refrigerator drawers for brining; just check it first and make sure it doesn’t leak.
To make a simple brine, dissolve 2 cups of salt in 2 gallons of water. Or you can try a more complex recipe, like The Pioneer Woman’s apple cider brine.
Pour the brine over the thawed turkey in the container, cover and refrigerate. If the turkey floats, you may need to weigh it down with a plate. Brine for 12 to 24 hours.
On Thanksgiving morning, take the turkey from the brine, rinse and dry it, and set it breast side up in the pan. Let it sit out until it warms to room temperature, about 1 1/2 hours. Preheat your oven to 450 degrees.
Massaging the Turkey
Meanwhile, make a mixture of 1 stick of softened salted butter and 1/4 cup of flour. (If you don’t have salted butter, add 1/4 teaspoon of salt.) You can use a pie cutting gadget to do this, but the real French technique is to use your hands.

When the butter and flour are mixed together, it will look like this:

Now, rub the turkey all over with the flour and butter mixture. Try to get it evenly on all the major area on top, and over the drumsticks.
This works best if the turkey is at room temperature and very dry. If the turkey’s a little cold and the mixture doesn’t go on evenly, don’t worry! Just pat it on the best you can.

Insert a meat thermometer in the thigh, and push it in so it’s in the meat but not touching a bone.
Roasting the Turkey
Put the turkey in the preheated, 450 degree oven, close the door, and immediately lower the heat to 325 degrees. Do not open the oven door for 30 minutes.
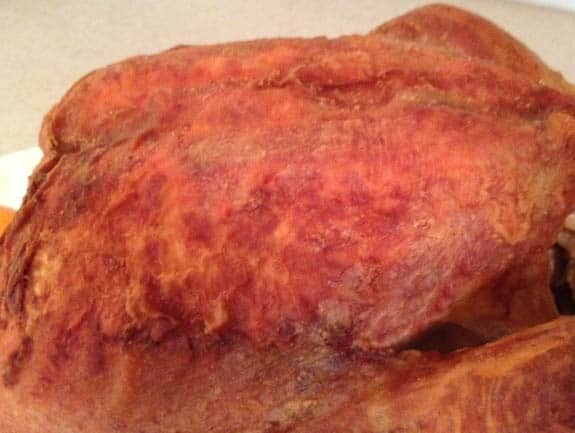
The high heat will cook the flour/butter mixture and make a light crust all over the turkey, which holds in the juices. Your thermometer will indicate when it’s time to take the turkey out, but here’s a rough time guideline:
Unstuffed Turkey Cooking Times
6 to 8 pounds 2 ¼ to 3 ¼ hours
8 to 12 pounds 3 ¼ to 4 hours
12 to 16 pounds 4 to 4 ½ hours
16 to 20 pounds 4 ½ to 5 hours
20 to 24 pounds 5 to 5 ½ hours
24 to 28 pounds 5 ½ to 6 hours
Stuffed Turkey Cooking Times
6 to 8 pounds 3 to 3 ½ hours
8 to 12 pounds 3 ½ to 4 ½ hours
12 to 16 pounds 4 ½ to 5 ½ hours
16 to 20 pounds 5 ½ to 6 ½ hours
20 to 24 pounds 6 ½ to 7 hours
24 to 28 pounds 7 to 8 ½ hours
After about 1 1/2 hours, the turkey will have developed a nice crust and you can start brushing it with some of the pan drippings. You will probably need to cover the drumsticks with foil about halfway through cooking so they don’t get too brown.

The final temperature on your cooking thermometer should be 170 to 175 degrees F in the thigh (and 165 degrees F in the stuffing). When you are cutting the turkey, the juices should run clear, not pink.
When the turkey is done, remove the thermometer, flip the bird (the turkey, that is) upside down and cool on a platter. This will help prevent dry white meat and let the juices from the bottom of the bird distribute to the top of the bird.

Let it cool for 20 minutes or so, before flipping it back breast-side-up for carving.
And if you’re looking for a yummy side dish, it’s hard to beat this Bacon Green Bean Casserole over at our sister site, BENSA Bacon Lovers Society.
Save for Later
If you use Pinterest to save recipes, here’s a handy pin:


Eliza Cross is the creator of Happy Simple Living, where she shares ideas to help busy people simplify cooking, gardening, holidays, home, and money. She is also the award-winning author of 17 cookbooks, including Small Bites and 101 Things To Do With Bacon.


Since it’s hard to get stuffing to a safe temperature of 165 without overcooking the white meat, I’ve converted to cooking my dressing outside of the bird in a covered dish, then drizzling the dressing with turkey drippings after it’s cooked to impart that “cooked in the bird” taste. And for a tasty brine, try mine with apple cider instead of water – definitely contributes to the taste beyond just the salt brine!
Thanks, Michele. I just added a link to your apple cider and herb brine recipe in the post, and readers can find it here:
http://cookingwithmichele.com/2009/11/how-to-cook-a-heritage-turkey/
Happy Thanksgiving!
just a quick question…Who won the book?
Thanks for asking, and Kerry Anita and Jane Bloss were the book winners. I’ll have more books to give away during the January Money Diet, including several new gardening books.
xo,
Eliza
Do you cover the turkey when u first put it in the oven? Thanks
No, you don’t need to cover the turkey when you first put it in the oven. The high heat creates a crust on the outside of the turkey that seals in the juices and keeps it moist. You’ll probably need to cover the drumsticks with foil about halfway through the cooking time to keep them from overcooking.
Happy new year, and enjoy your turkey!
I have been fortunate enough to have eaten this at Eliza’s home and can vouch for the fact that it is delicious–makes me hungry just thinking about it!
When you brine the turkey does it need to be unthawed? Also do you keep the brine in frig or leave out? Haven’t cooked a turkey on my own before. Thanks for the help.
Great questions! The turkey should be thawed when you put it in the brine, and it should be refrigerated while it’s in the brine. With a big turkey, I sometimes remove one of the racks in the refrigerator to accommodate the large pot. Hope this helps, and happy Thanksgiving!
My family always used the butter and flour method. We cook the turkey upside down first then flip it right side up during the cooking.
years ago, about 30, I made a turkey coated withthe flour and then made a baste using butter and cranberry sauce, combined in a saucepan until mixed with chicken broth. The turkey was a deep mahogany color. From the drippings I made a gravy using more butter and flour. The receipe was in a neighborhood paper. If anyone has the receipe I would appeciate it so much
My mom made her turkey this way all my life(born in 1968)
It’s not thanksgiving to me if it’s not done the flour way.
I loved eating the crisp flour pieces, so delicious and full of flavor.
Skye, thank you for stopping by and I am so happy to hear that your mom also cooked your Thanksgiving turkey this way. What a tasty tradition!